Entity page
Each entity has a dedicated page that contains 4 tabs (by default):
Overview
The overview tab is a dashboard, used to display widgets related to the entity.
By default, each entity will have a Details widget, which displays the entity's properties and their values, and other metadata.
Manage properties
In the top right corner of the details widget, you can find the ![]()
![]() button that opens the "manage properties" modal, which allows you to:
button that opens the "manage properties" modal, which allows you to:
- Show/hide empty values - properties with empty values will be hidden if the toggle is off.
- Show/hide specific properties in the widget.
Additional widgets can be added by clicking on the + Widget button in the top right corner of the dashboard.
Related entities
By default, all related entities in the same direction will automatically appear in this table. This is true for both forward-related and backward-related entities. Indirectly-related entities will not appear but can be added manually, check out the indirect relations section on how to add indirectly related entities.
For example:
Workflow Run has a forward-relation to Deployment Workflow, which has a forward-relation to Service, which has a backward-relation to Deployment.
Since we changed direction midway, this relation is indirect:
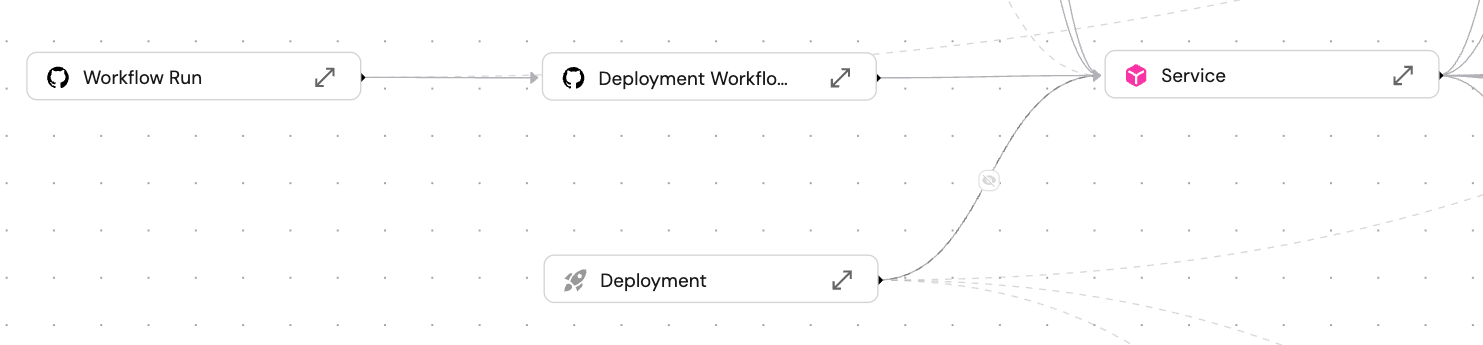
When looking at the entity page of a certain Workflow Run, the related entities Deployment Workflow and Service automatically appear, but Deployment does not, since its relation is in the other direction.
Add a Related entities tab
-
Click the
+button above the table to add a custom tab.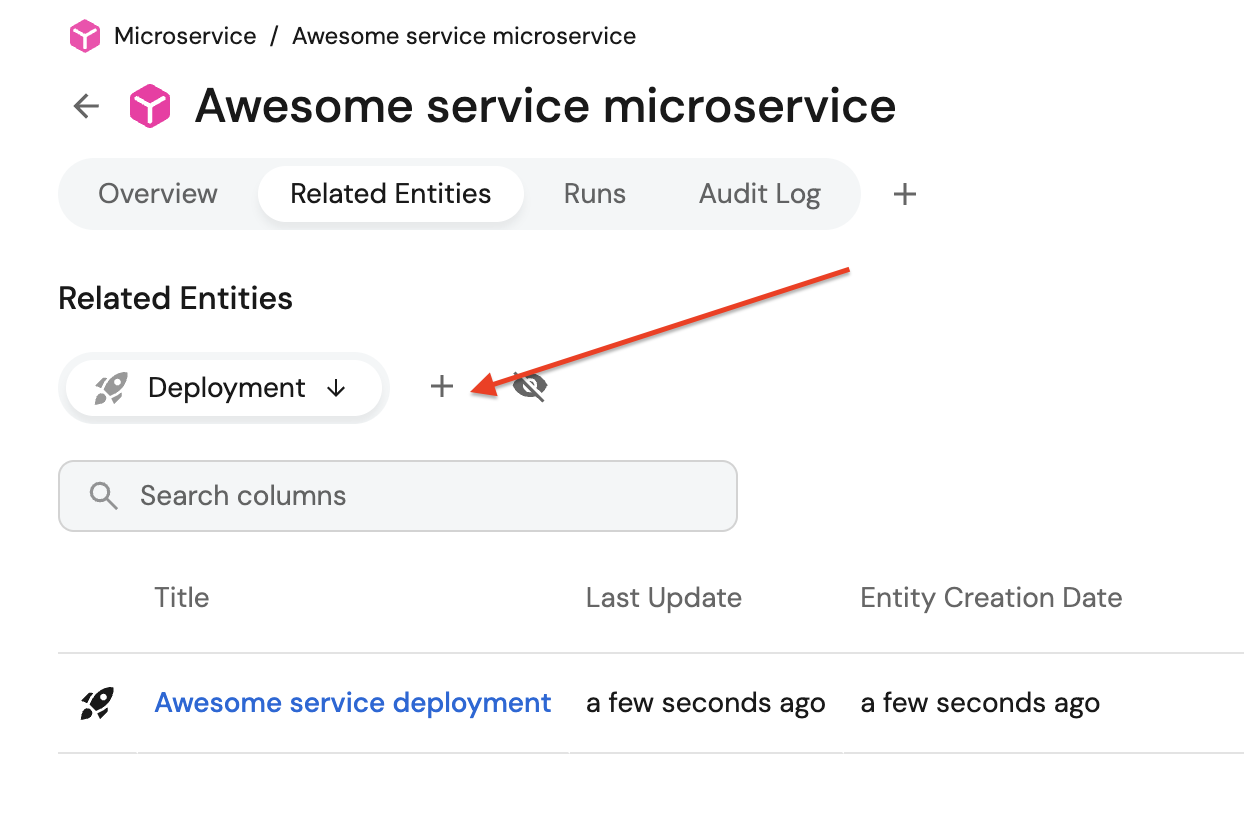
-
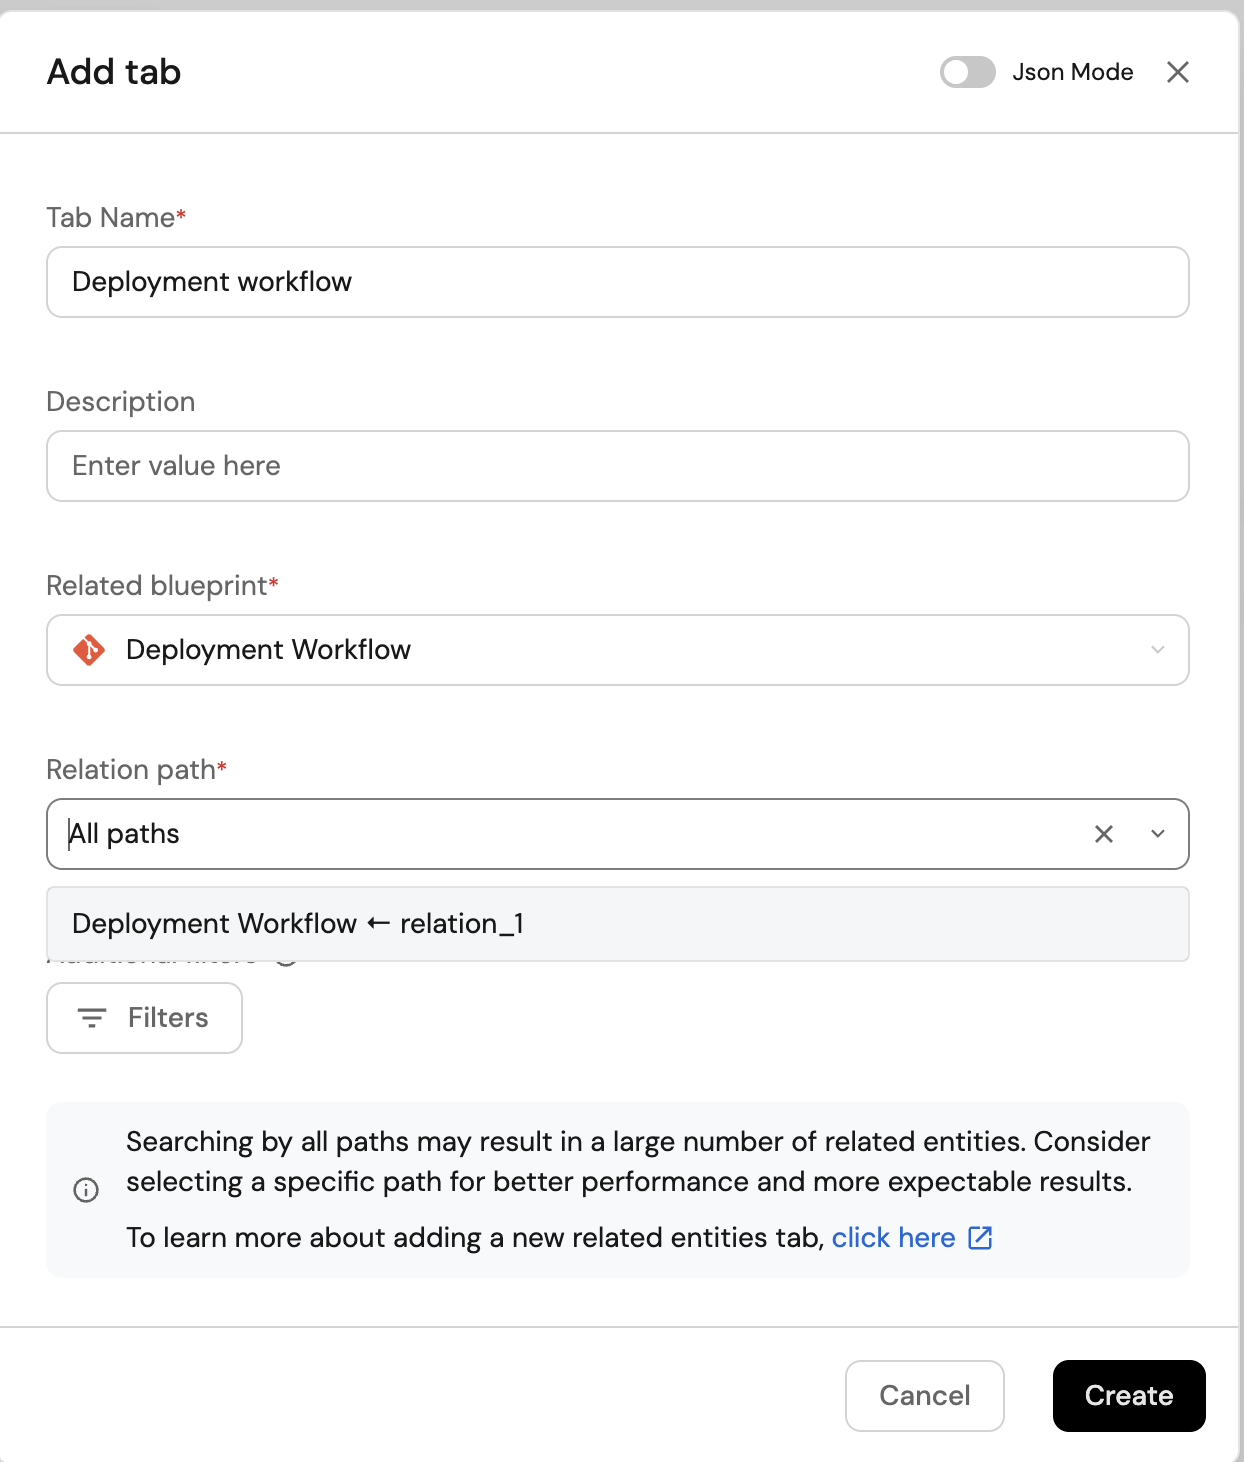
Fill in the form:
-
Set the tab's
Nameand optionalDescription. -
Choose the
Related blueprintyou want to display. -
Pick a
Relation path:- All paths – includes all available paths from the current blueprint to the target blueprint.
- Specific path – choose the specific relation chain.
-
(Optional) Add
Additional filtersto restrict the result set.
-
The relation path dropdown displays straightforward, acyclic paths. For complex scenarios involving circular relationships, advanced path configurations, multiple self relations, or maxHops, use JSON mode.
Using "All paths" is less performant than selecting a specific path, as it requires the system to evaluate multiple relationship paths.
Additional filters
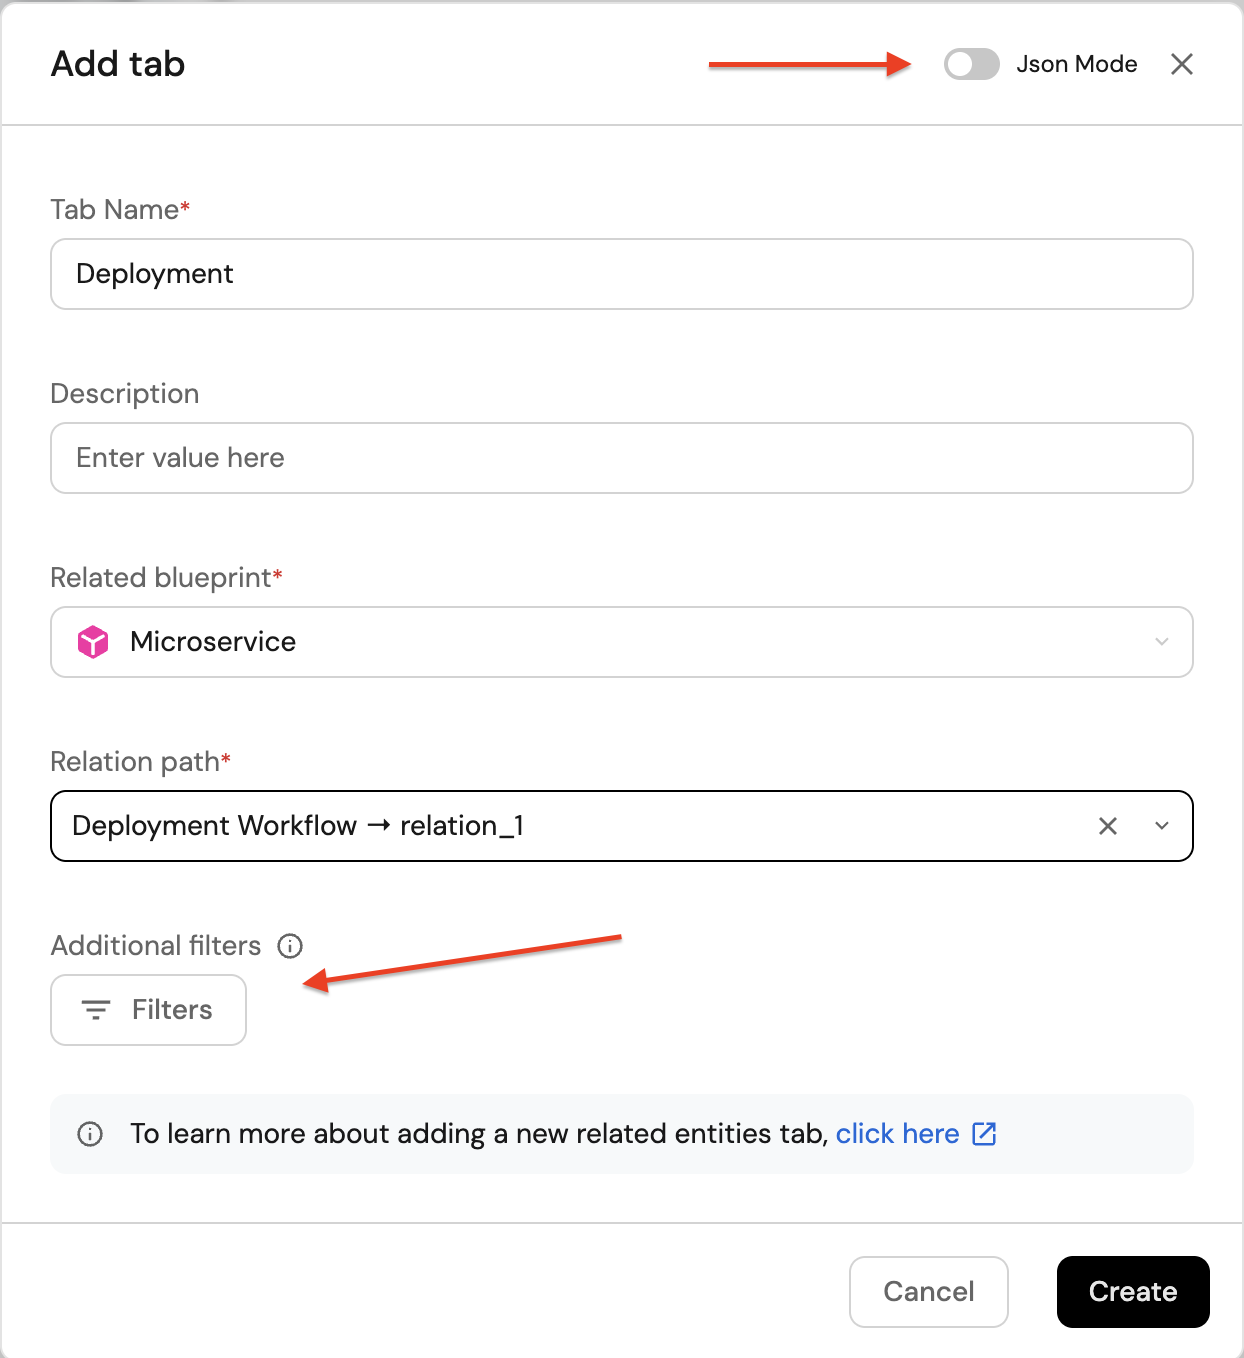
Selecting Filters opens a dialog where you can build conditions using form controls (property, operator, value).
You can switch to a JSON editor using the Edit JSON button to define the dataset directly.
The filters visual editor doesn't support nested queries so in the case of nested queries, use the JSON editor to define the dataset.
The dataset follows this structure based on the search and query syntax:
{
  "combinator": "and",
  "rules": [
    {
      "property": "$title",
      "operator": "contains",
      "value": "awesome-package"
    }
  ]
}
Use the JSON editor when you need to copy/paste filter sets, keep them in source control, or express conditions that are faster to author as JSON. You can toggle back to the form at any time.
Define the tab in JSON mode
You can also toggle Json Mode in the "Add tab" dialog to author the entire tab as JSON. An example:
{
  "dataset": {
    "combinator": "and",
    "rules": [
      {
        "property": "$title",
        "operator": "contains",
        "value": "awesome-package"
      }
    ]
  },
  "title": "custom path package",
  "targetBlueprint": "Package",
  "relationPath": {
    "path": ["service_in_env", "package"],
    "fromBlueprint": "service_in_env_deployments"
  }
}
This JSON corresponds to a tab named custom path package that targets the Package blueprint, follows a specific path from service_in_env_deployments via service_in_env to package, and filters results to titles containing the letter awesome-package.
Show/hide columns
By default, the related entities table will display the following columns for each entity:
Title, Last update time, and Creation time.
Other properties will be hidden by default.
You can always customize the table to hide/show columns.
Indirect relations
In some scenarios, you may want to display entities that are not directly related but connected through a common blueprint. This is useful when you have multiple services that share relationships with a common entity.
For example, consider this relationship structure:
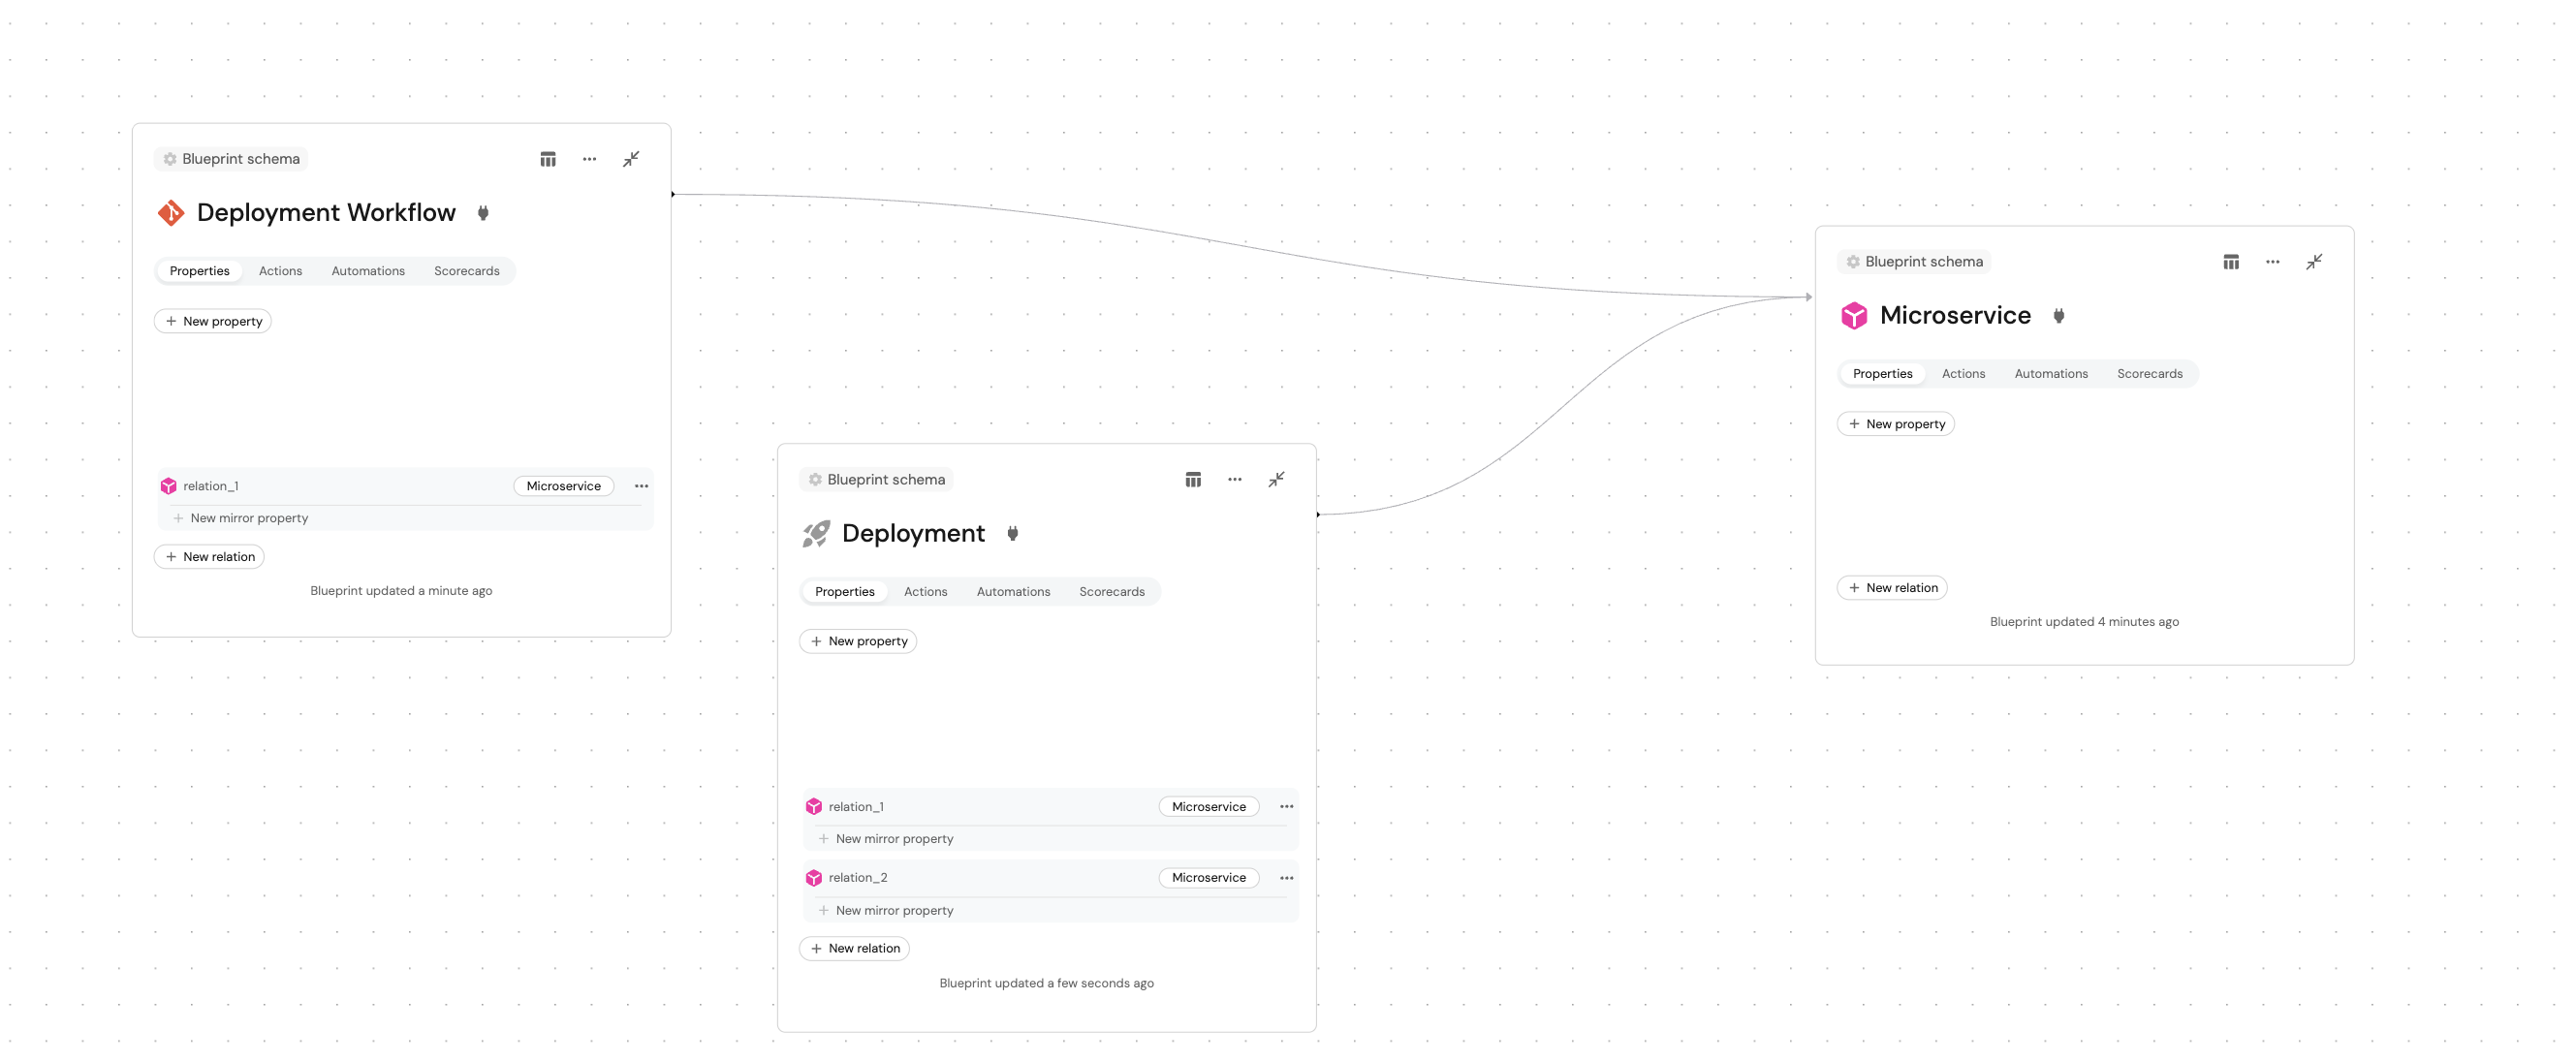
From the diagram, we can see that:
- Deployment Workflow has a relation to Microservice
- Deployment has relations to Microservice (including
relation_1andrelation_2) - Deployment Workflow and Deployment are not directly related, but connected through Microservice
When you're on the entity page of a Deployment Workflow, the related entity Microservice automatically appears, but Deployment does not, since its relation is in the other direction. However, you can create a custom tab to show Deployment entities by leveraging the indirect relationship through Microservice.
Add a tab for an indirectly related blueprint
-
Click the
+button above the Related Entities table. -
Set the tab name and description.
-
Choose Deployment as the
Related blueprint. -
For the
Relation or property, select the specific relation from Deployment Workflow to Microservice that you want to traverse.
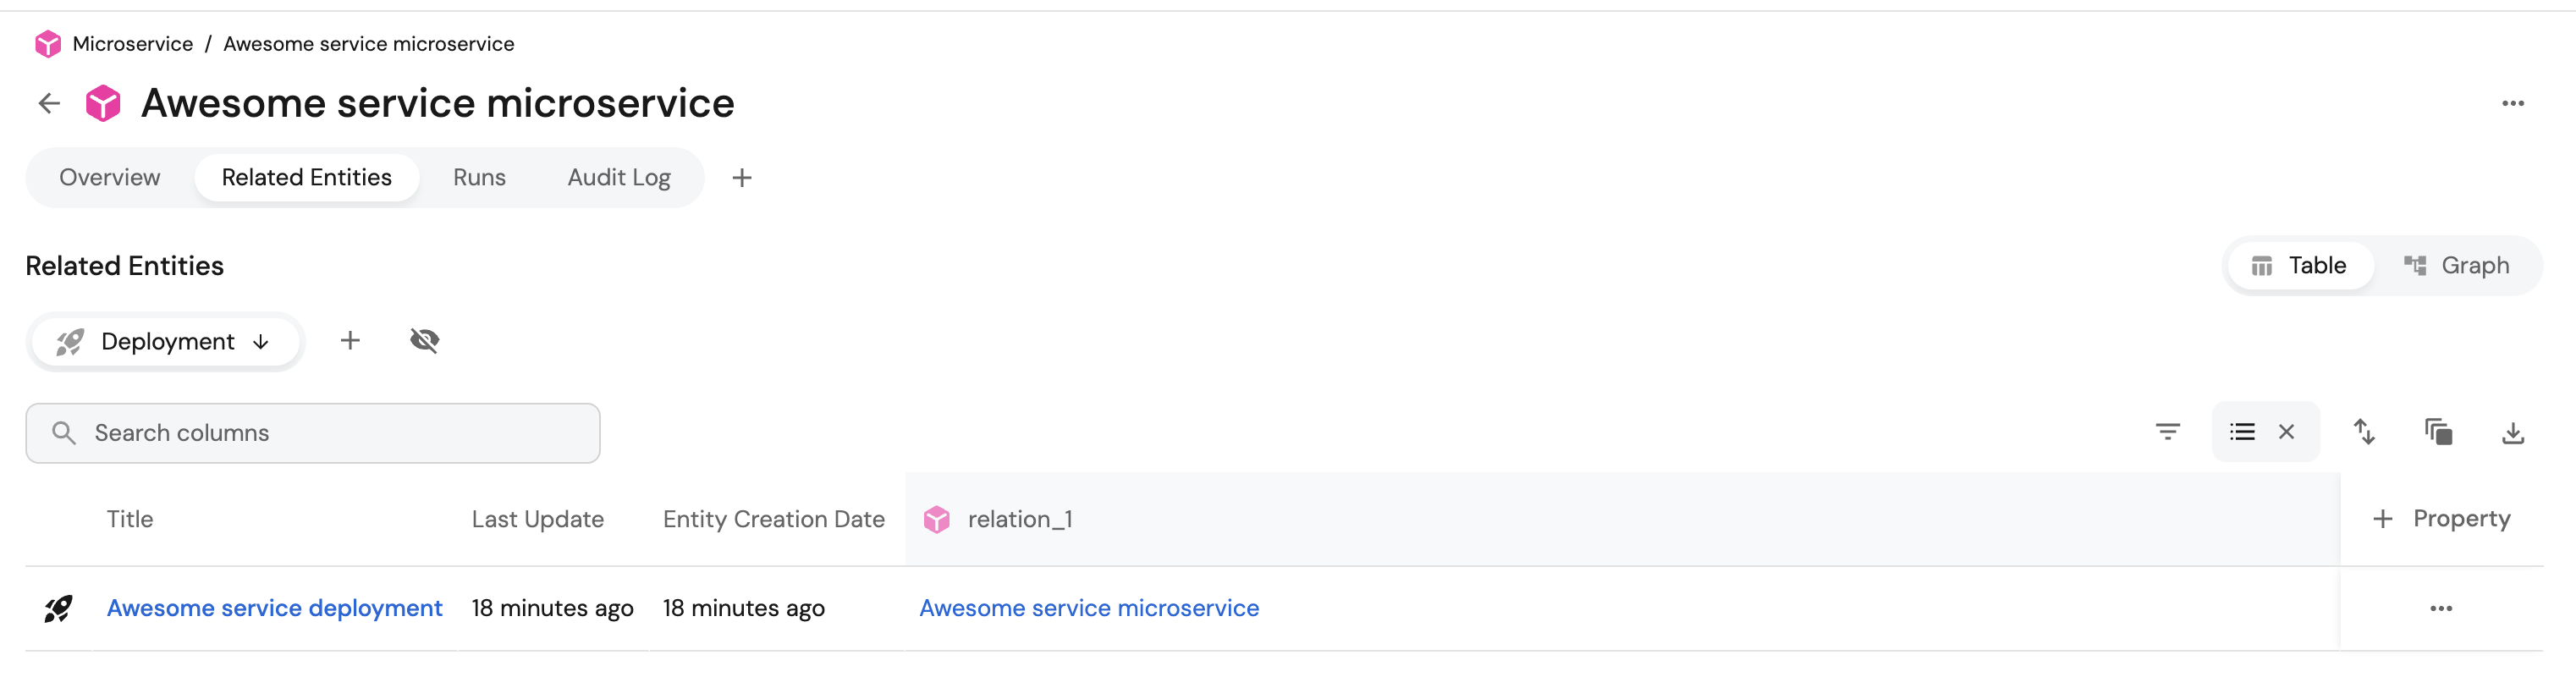
This approach allows you to display indirectly related entities while maintaining control over the specific relationship path used for the connection.
If Deployment Workflow has multiple relations to Microservice (e.g., deployment_target and monitoring_target), you can choose which specific relation path to use for more refined and filtered results.
Additionally, when you have an existing relation between blueprints, Port automatically creates a mirror property relation that allows you to traverse the relationship in both directions. This mirror relation will appear as an option in the relation dropdown, enabling you to explore connections from either side of the relationship.
Self relation
A self relation allows a blueprint to establish a relationship with itself. This is useful when you want entities of the same blueprint to be related to other entities within that same blueprint.
For example, consider an Organization blueprint where:
- Organizations contain teams
- Teams can belong to other organizational entities (like groups)
- All entities share the same blueprint but have hierarchical relationships
When defining a self relation, you can specify how many "hops" to traverse in the relationship chain.
Hops represent the number of jumps you want to make upstream or downstream through the self-relation.
Set up self relations
Follow these steps to set up a self relation in related entities:
-
Click the
+button above the Related Entities table. -
Choose your blueprint as the
Related blueprint. -
Select the self relation path from the available paths.
How self relation hops workIf you want more than one hop then you would have to toggle
Json modeon to specify more than one self relation blueprint identifier for the number of hops you want to make. -
You can also toggle to
Json modein the "Add tab" dialog to define the relationship path with precise control over hops.For example if we want to make 2 hops then we would have to specify 2 self relation blueprint identifiers in the path array.
"relationPath": {
 "path": [
   "self_relation",
   "self_relation"
 ]
}
In JSON mode, you can use the
maxHopsfeature to control the number of relationship traversals. Path elements can be objects instead of strings, andmaxHopscan only be specified once in the path."relationPath": {
{
"relation": "<SELF_RELATION_IDENTIFIER>",
"maxHops": <number between 1 and 15>
}
}You can also have a mix of fixed and variable hops.
"relationPath": {
  "path": [
    "self_relation",
    {
      "relation": "<SELF_RELATION_IDENTIFIER>",
      "maxHops": <number between 1 and 15>
    }
  ]
}
maxHops limitationYou can only use
maxHopsonce in a path and it it accepts a number between 1 and 15. -
Click on
Saveto save the tab.
Note that self_relation in these examples represents the identifier of the self relation you created in your blueprint. Replace it with your actual self relation identifier.
Examples
Let's take a look at some examples using the concept of Teams.
Basic self relation with multiple self relations:
If you want exactly 2 hops, specify the relation twice:
{
  "dataset": {
    "combinator": "and",
    "rules": []
  },
  "title": "Team Hierarchy",
  "targetBlueprint": "Team",
  "relationPath": {
    "path": [
      "self_relation",
      "self_relation"
    ],
    "fromBlueprint": "Team"
  }
}
Self relation with maxHops for variable hops:
If you want a variable number of hops (between 1 and 15), use maxHops:
{
  "dataset": {
    "combinator": "and",
    "rules": []
  },
  "title": "Team Hierarchy",
  "targetBlueprint": "Team",
  "relationPath": {
    "path": [
      {
        "relation": "team_self_relation",
        "maxHops": 4
      }
    ],
    "fromBlueprint": "Team"
  }
}
Mixed approach example:
You can also mix fixed hops with variable hops. For example, if you specify self_relation twice followed by a maxHops object, the system will start traversing from the 2 hops already made and continue with the additional hops specified in maxHops.
"relationPath": {
  "path": [
    "self_relation",           // 1st hop: Unit -> Basic Team
    "self_relation",           // 2nd hop: Basic Team -> Group
    {
      "relation": "team_self_relation",
      "maxHops": 3            // Continues from Group, adding up to 3 more hops (Group -> Office -> etc.)
    }
  ]
}
In this example, the system will traverse 2 fixed hops (Unit → Basic Team → Group) and then continue with up to 3 additional hops using the team_self_relation, starting from where the fixed hops left off. This could represent a complete organizational hierarchy from Unit all the way up to higher-level organizational structures.
Simple relation path example:
You can also use regular relations (not self-relations) in your paths:
{
  "dataset": {
    "combinator": "and",
    "rules": []
  },
  "title": "Developer",
  "targetBlueprint": "developer",
  "relationPath": {
    "path": [
      "member_of"
    ]
  }
}
The fromBlueprint property is only needed when the path starts from the current page's blueprint and ends with the entities listed in the tab. For more information about relation paths see the Relation operators documentation.
Runs
If the entity's blueprint has any actions configured, the Runs tab will display their history log, results, log streams, and more.
Audit log
This tab displays all actions (including CRUD) that caused any change to the entity's configuration.
For each change, useful metadata will be shown such as the initiator, diff before and after the change, relevant blueprint, and more.
Additional tabs
Visual properties
Some of the available property types are visual by nature. When defining one of these properties in a blueprint, an additional tab will be automatically created in each entity page related to this blueprint, displaying the property's content in the relevant visual format.
The following property types are supported:
Scorecards
If the entity's blueprint has any scorecards configured, a Scorecards tab will be automatically created in the entity page.
The tab will display the entity's compliance status with each of its scorecards.
Dashboard tabs
You can add additional, customizable dashboard tabs to an entity page by clicking the + button.
Each dashboard tab name can be customized and edited.
Limitations
- You can add up to 5 dashboard tabs per entity page.
- Dashboard tab names must be unique and are limited to 30 characters.